How to Share an Office 365 Document with an External User
Instructions for sharing Office 365 documents and various other documents such as PDF, JPG, and other items can be found by viewing the video tutorial found at the following link: Microsoft Sharing Documents
Step 1:
Go to your document (note this can be using any of the Office 365 applications) and click the “Share” button in the top right corner
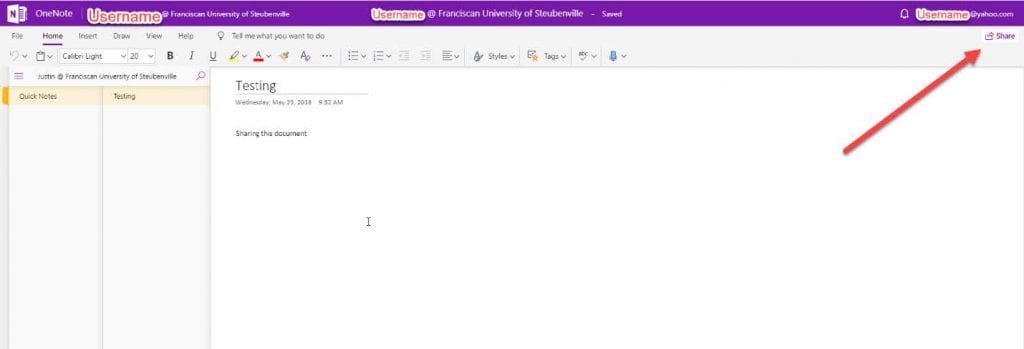
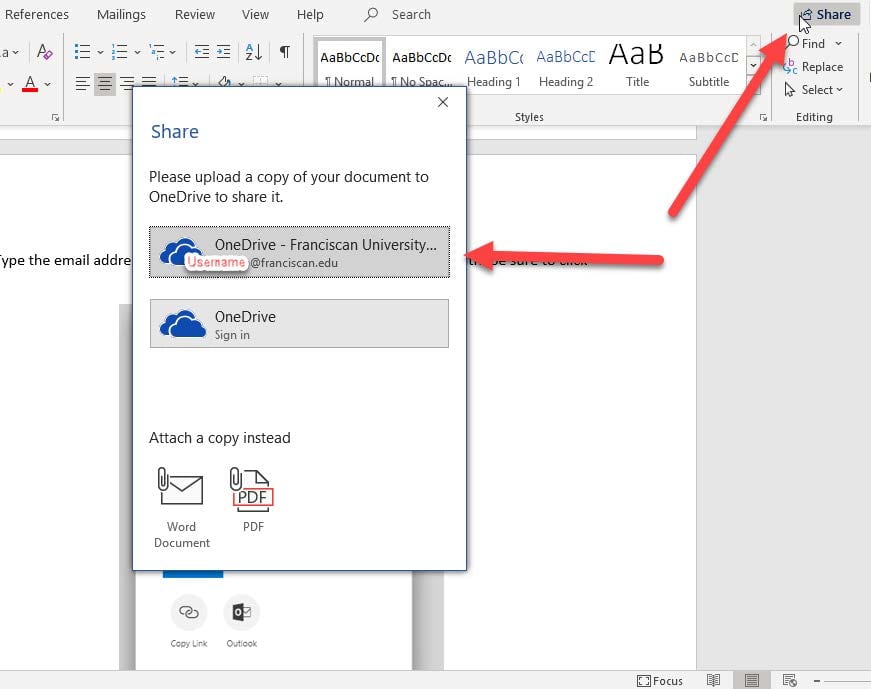
If the document is not in your OneDrive account you will want to save it to your OneDrive by clicking “Share” and then selecting your OneDrive account. Note the ”Share” button is only visible on Office Applications.
Step 2:
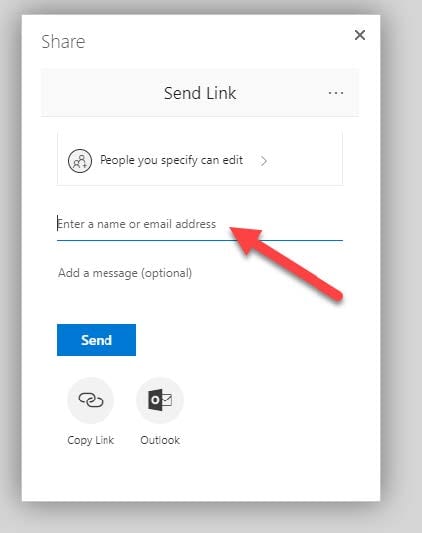
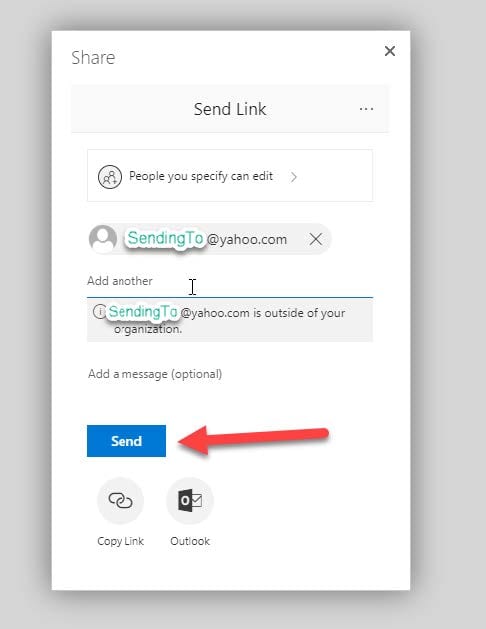
Type the email address of the user(s) you want to share the document with. Be sure to click each name to add them to your list
Step 3:
Once your list is complete, click the “Send” button.
Step 4:
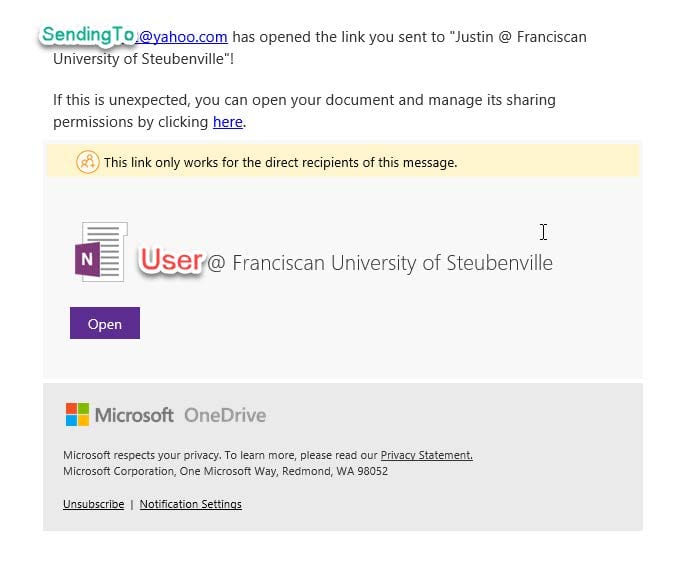
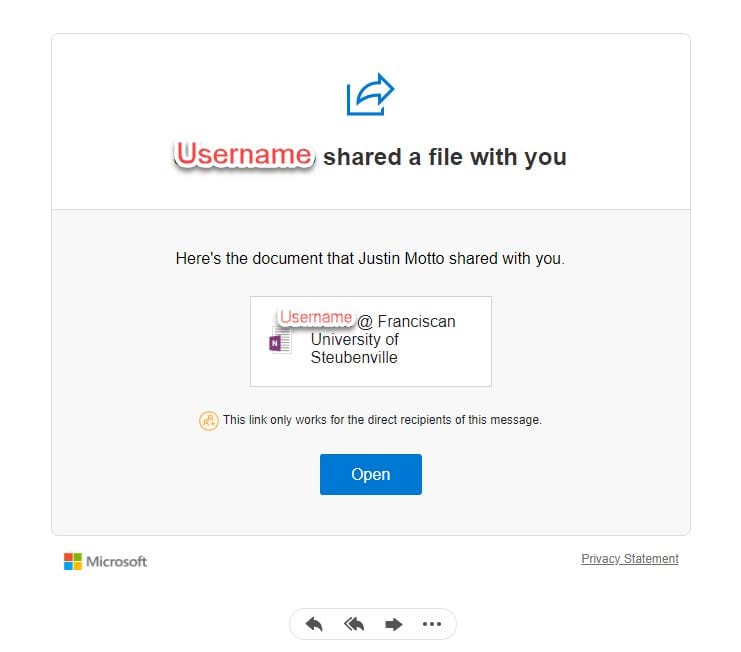
The user(s) you’re sharing the document with will get an email that looks similar to the image below. They will then need to click the “Open” button:
Step 5:
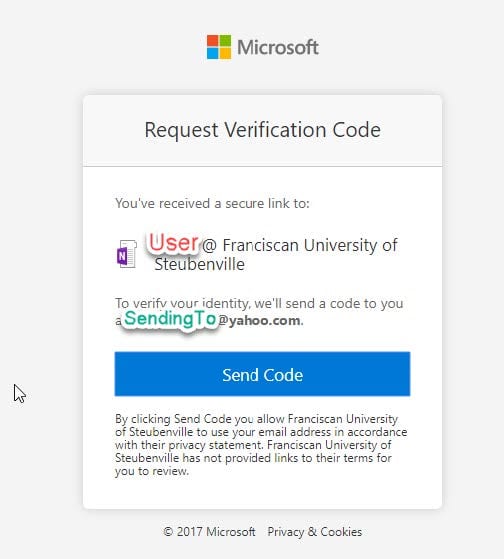
They will then click the “Send Code” button.
Step 6:
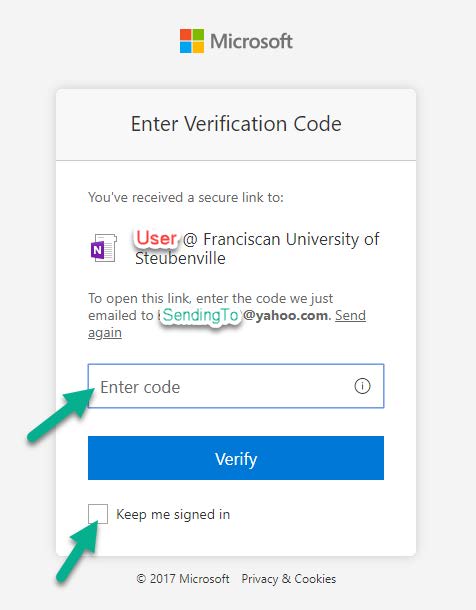
The page will refresh and the end user will need to enter a verification code that will be emailed to them shortly. They can also check the “Keep me signed in” box for faster verification for future documents.
Step 7:
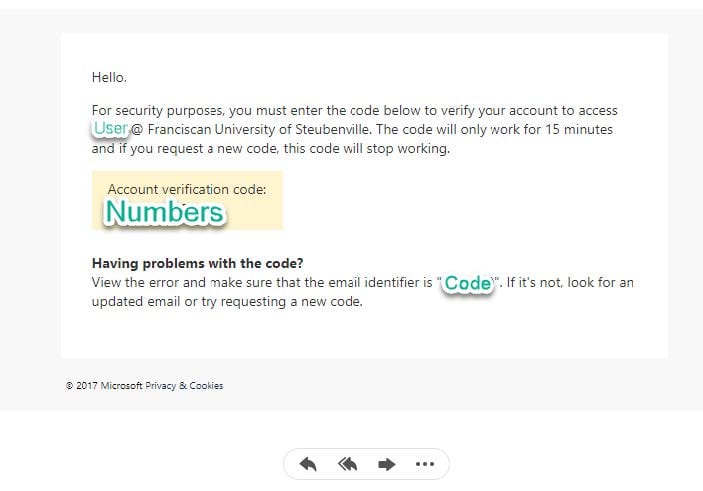
The email will look similar to the below message. The account verification code will need to be copied and pasted into the “Enter code” box on the previous page.
Step 8:
The end user will now have access to the document you shared with them. You will receive a confirmation email as well stating that the document has been opened.
